Pouch guide
Designing Artwork for Printed Pouches
Dielines, bleed, seal areas, white ink on foil, barcodes, type sizes and the files our designers need.
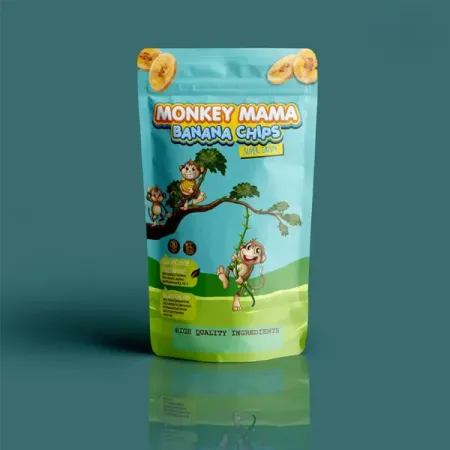
What is a pouch dieline and why does it matter?
A dieline is the flat drawing of the pouch before it is folded and sealed. For a stand up pouch it shows the front, the back and the gusset as one sheet, with the seal areas, the zipper line, the tear notch, any valve and any window marked.
Artwork is laid onto that sheet. The parts that will be hidden in a seal or a fold are marked so nothing important lands there.
You do not need to draw one. Once your size is agreed, we send the dieline for that exact pouch, or our designers place your artwork on it for free. Every pouch on the site, from a full colour printed mylar bag to a sachet, starts with that step.
Where are the seal areas, and what can go in them?
Seals are the hot-pressed bands around the edges of a pouch. On a stand up pouch, the side seals are 5 to 8 mm wide, the top seal 10 to 15 mm, and the gusset has a fold line plus two angled seals at the base.
Colour and pattern can run through the seals, and should, so the edge of the pouch is not white. Text, logos and barcodes should not, because the seal distorts whatever sits under it.
Keep a safe zone of 5 mm inside every seal and 10 mm from the gusset fold. On a 140 mm wide pouch that leaves a front face of about 120 mm for anything that must be read.
| Element | Where it sits | Keep clear by |
|---|---|---|
| Side seals | 5 to 8 mm each side | 5 mm inside the seal |
| Top seal | 10 to 15 mm below the top edge | 5 mm below the seal |
| Zipper | 20 to 30 mm down from the top | 5 mm above and below |
| Tear notch | In the side seal, above the zipper | Nothing needed, it is in the seal |
| Gusset fold | The crease where the base folds | 10 mm each side of the fold |
| Valve | A 20 mm circle on the back or gusset | 15 mm around the circle |
| Window | Where you place it | 10 mm from any seal or fold |
| Hang hole | Centred above the top seal | 8 mm around the hole |
How much bleed and what resolution?
Add 3 mm of bleed on every outer edge of the dieline. That is colour or pattern running past the cut line, so a small shift in cutting does not leave a white sliver.
Images need 300 dpi at the size they will print. A photo that looks fine on a phone is often 72 dpi and prints soft at 100 mm wide. Logos and text should be vector, so they stay sharp at any size.
Working at full size in millimetres avoids most scaling mistakes. If your designer works in inches, ask for the file in millimetres anyway, because the dieline will be.
Why does foil and kraft need a white under-print?
Ink is translucent. On white film, the white shows through the ink and the colours look as they do on screen. On silver foil, the metal shows through and every colour goes dark and metallic. On brown kraft, colours go muddy.
The fix is a layer of white ink printed first, under the colours, wherever they must look true. In the artwork this is a separate spot colour, usually named White, set to overprint, covering the areas that need it.
Leave the white out on purpose to get a metallic effect: a logo in clear varnish on gold, a silver band showing through. The gold mylar bags are often printed that way, with white only behind the text panel.
- White film: no under-print needed
- Silver or gold foil: white under every colour that must look true
- Kraft paper: white under pale colours and photos
- Clear film: white block behind any text that sits over the product
- Matte black: white under-print, then colours on top
How small can text and lines go?
Digital print holds positive text down to 6 pt and reversed-out text, white on a dark background, down to 8 pt. Lines should be at least 0.25 pt, about 0.1 mm. Plate print on foil is a little less forgiving, so add a point to each.
Legal text on a food pouch has its own rules on minimum size, which your own regulatory adviser should confirm. Our designers flag anything that looks too small to print cleanly, but they do not check the content of a label.
Thin serif fonts and very light weights fill in on kraft and break up on foil. Where a design uses them, keep them large or set them in white under-print.
How should barcodes be set up on a pouch?
A barcode needs dark bars on a light background, a quiet zone either side, and no distortion. On foil or kraft, that means a solid white under-print panel behind it, 2 to 3 mm bigger than the code on each side.
An EAN-13 at 100 percent is 37.3 × 25.9 mm. It can be reduced to 80 percent, about 30 mm wide, but not below. Place it on the back face, away from the gusset fold and the valve, and keep the bars running vertically up the pouch so any stretch in the film does not change their width.
Supply the barcode as a vector file from your barcode provider, not as a screenshot. The proof shows it at final size for you to check.
Which colours and finishes change the file?
Full colour digital print works in CMYK. Convert the file before sending, or expect bright RGB blues and greens to dull slightly. Full colour plate print can match a reference colour, so name it in the brief.
A rich black for large areas is C40 M30 Y30 K100. Plain K100 prints as a dark grey on some films. Spot gloss over matte needs a separate layer showing where the gloss goes, and metallic effect needs the white under-print layer left out in those areas.
Finishes are chosen at the quote, not in the file. A matte black pouch with spot gloss is built from a plain black file plus one gloss layer, nothing more.
Which files do our designers need?
The best file is a print-ready PDF with fonts outlined, images embedded at 300 dpi, 3 mm bleed and the white and gloss layers as named spot colours. An Illustrator or InDesign file with linked images packed is just as good.
If you only have a logo, send it as a vector PDF, AI, EPS or SVG, with the colours you want and any photos you own. Our designers draw the rest on the dieline for free and send a proof.
What does not work: a screenshot of a logo, a JPEG under 1,000 pixels, a Word document or a Canva download with no bleed. We can rebuild from these, but it adds a proof round.
- Agree the pouch size, then request the dieline.
- Place artwork on the dieline with 3 mm bleed and 5 mm safe zones.
- Add the white under-print layer for foil, kraft or clear film.
- Set barcodes on a white panel and check the size.
- Convert to CMYK, outline fonts, save a print-ready PDF.
- Approve the free proof, then production starts.
What goes wrong with pouch artwork?
Nearly every artwork problem is caught on the proof, which is why nothing prints before you approve it. The ones that reach the proof stage most often are listed below.
The expensive ones are the ones approved without a close look: a barcode that scans badly, a date panel placed in a seal, a flavour name spelt wrong on one of six variants.
- Text or a barcode in the seal or across the gusset fold
- No white under-print on foil, so the first proof looks bronze
- Low resolution photos that print soft
- RGB files that shift when converted to CMYK
- Reversed-out text under 8 pt on a dark pouch
- Window placed where the product is not, so it shows empty film
How does the proof and ordering process run?
Send the files with the pouch size, the laminate and the quantity. The quote comes back in writing, priced from £0.25 for each pouch at that quantity. Our designers send a free proof on the dieline, with seals, zipper, valve and window marked.
Check the proof at full size, then approve it. From that point the print run needs 4 to 6 business days. The parcel then travels free and tracked to any UK address over the next 2 to 3 business days. Several flavours or sizes on one design are proofed together, each on its own dieline, as the snack pouches in several flavours usually are.